Printing
You must be on a UCSD network (ethernet, wireless, or VPN) before configuring our printers.
Printers are already configured on most SCCN desktops and workstations. If they are not, please contact the SCCN system administrator. If you have administrator privileges on your own desktops or personal devices, the information below is for you.
The SCCN printers are named
- copying
- coloring
The INC printers are named
- inc-workcentre
- inc-color
Our printers require drivers during the printer setup. For your convenience, these are available in the software share (\\sccn.ucsd.edu\software or \\inc.ucsd.edu\software). You will need to be on the UC San Diego network and have an SCCN or INC account in order to access this location. Download them in advance from Xerox drivers or HP drivers for your specific computer hardware and operating system. MacOS installations will vary somewhat from the screenshots shown because the document author has not had access to a Macintosh in several years.
Windows
copying
Run Printers & scanners from System settings.

Click Add device.

Scroll down to click Add a new device manually.

Select Add a printer using a TCP/IP address or hostname.
Click Next.
Set the following:
Pop up Device type: TCP/IP Device.
Hostname or IP address: copying.ucsd.edu.
Port name: copying.ucsd.edu.
Uncheck Query the printer and automatically select the driver to use.
Click Next.

Click Have Disk....

Click Browse....
Navigate to your Desktop or Downloads folder where you extracted the driver in the first step above.

Browse for the file named x2WCASX.inf.
Click OK.
Click Open.

Select Xerox WorkCentre 4250 PCL6.
Click Next.

Type printer name: copying.
Click Next.

Check: Do not share this printer.
Click Next.

Click Finish.

Select the printer: copying.
Click Printer properties.

Click the Advanced tab.
Click Printing Defaults....

Click the Paper/Output tab.
Select 2-Sided Printing: 1-Sided Print.

Click the Advanced tab.
Expand Paper/Output.
Pop up and select
Job Identification: Disable Job ID.
TrueType Font: Download as Softfont.
Click: OK.
Click: OK.
coloring
Run Printers & scanners from System settings.
Click Add device.

Scroll down to click Add a new device manually.
Select Add a printer using a TCP/IP address or hostname.
Click Next.

 Set the following:
Pop up Device type: TCP/IP Device.
Hostname or IP address: coloring.ucsd.edu.
Port name: coloring.ucsd.edu.
Click Next.
Click Have Disk....
Browse for the file named hpc4520u.inf (could have a different name) in the driver folder you created above. Click OK..

Type:
Printer name: coloring.
Click Next.

Click Finish.
Uncheck Set as the default printer.

inc-workcentre
Run Printers & scanners from System settings.
Click Add device.
Scroll down to click Add a new device manually.
Select Add a printer using a TCP/IP address or hostname.
Click Next.
Set the following:
Pop up Device type: TCP/IP Device.
Hostname or IP address: inc-workcentre.ucsd.edu.
Port name: inc-workcentre.ucsd.edu.
Uncheck Query the printer and automatically select the driver to use.
Click Next.

Click Have Disk....
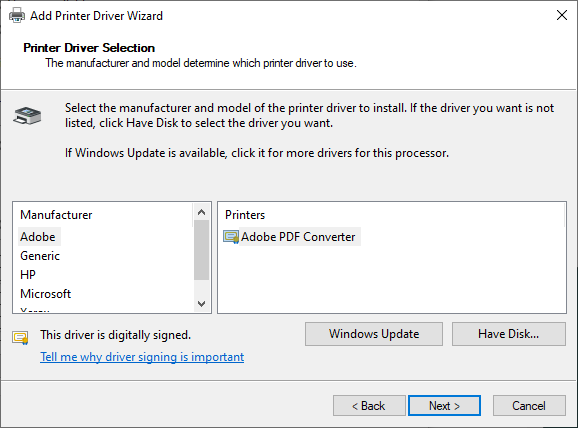
Click Browse....
Navigate to your Desktop or Downloads folder where you extracted the driver in the first step above.

Browse for the file named x2WCASX.inf.
Click OK.
Click Open.

Select Xerox WorkCentre 4250 PCL6.
Click Next.
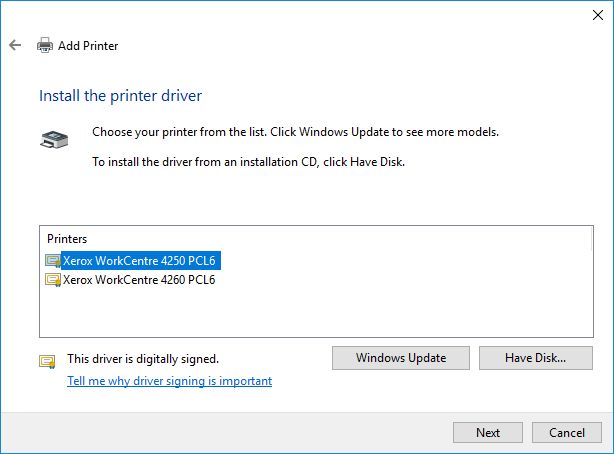
Type printer name: inc-workcentre.
Click Next.

Check: Do not share this printer.
Click Next.
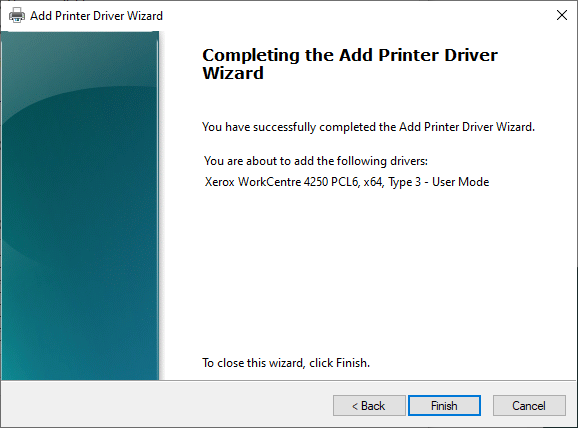
Click Finish.

Select the printer: inc-workcentre.
Click Printer properties.
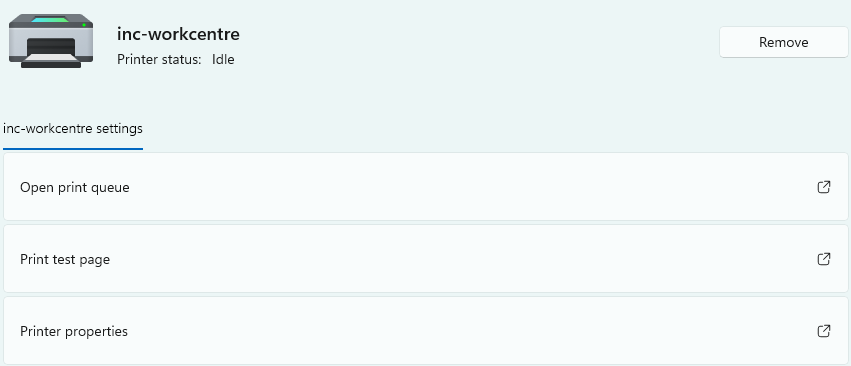
Click the Advanced tab.
Click Printing Defaults....

Click the Paper/Output tab.
Select 2-Sided Printing: 1-Sided Print.

Click the Advanced tab.
Expand Paper/Output.
Pop up and select
Job Identification: Disable Job ID.
TrueType Font: Download as Softfont.
Click: OK.
Click: OK.

inc-color
Download the printer driver to your Downloads or Desktop folder.
Extract the contents to your Downloads or Desktop folder.
After installing the printer, remember to delete the zip and exctacted driver folder. You will no longer need those.
Run Printers & scanners from Settings.
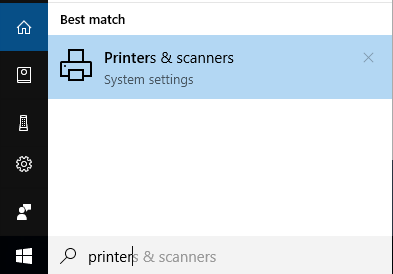
Click Add printers & scanners..
Scroll down to click The printer that I want isn't listed.

Select Add a printer using a TCP/IP address or hostname.
Click Next.
Set the following:
Pop up Device type: TCP/IP Device.
Hostname or IP address: inc-color.ucsd.edu.
Click Next.

Click Have Disk....
Replace A:\ with (copy and paste): \\inc.ucsd.edu\software\Printing\inc-color\Windows\hpma382A4_x64.inf
Click OK.
Select HP Color LaserJet M553 PCL-6.
Click Next.
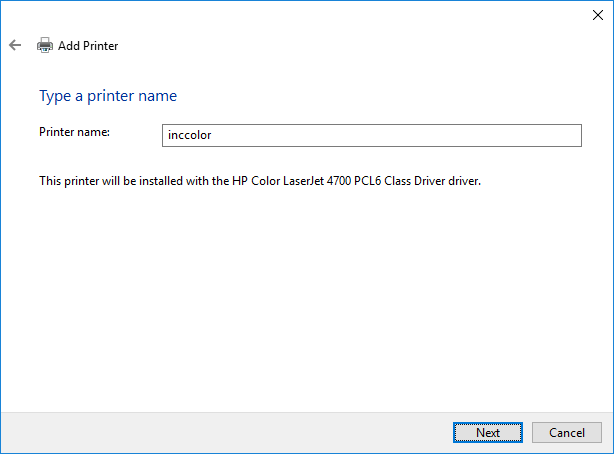
Type
Printer name: inc-color.
Click Next.
Check: Do not share this printer.
Click Next.
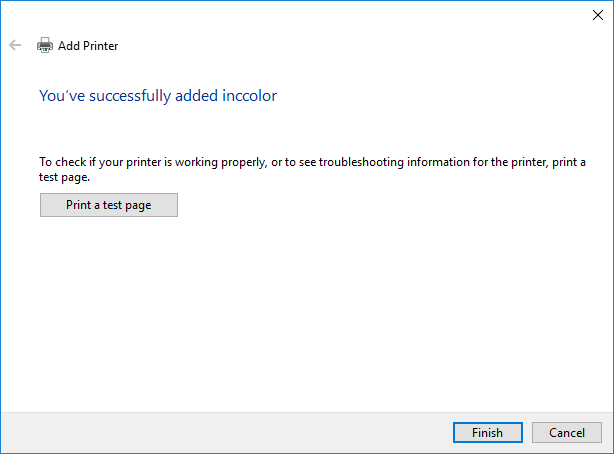
Do not Print a test page.
Click Finish.
macOS
copying
Delete the old printer
If you have a printer named copying already defined, please delete it before continuing.
Access Printers & Scanners from your System Settings.
Select copying in the printer list.
Click the – (minus sign).
Click Delete Printer.

If you did not already have a printer named copying defined, download the Xerox macOS Print and Scan Driver Installer and follow the next several steps for installing the Xerox printer drivers. Otherwise, continue farther down with adding the new printer.
Install the printer driver
Double-click the driver installer.
Click Continue and Agree to the license agreement in the following screens.
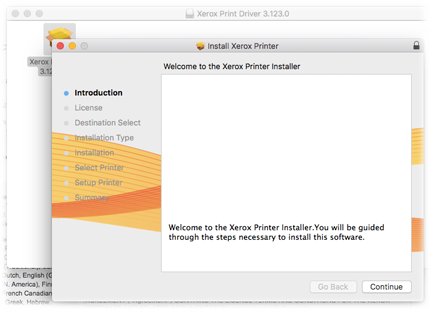

Install to your hard drive.
Click Continue.

Click Install.

Be patient while the drivers are installed.
When allowed, click Continue.

Do not continue setting up a printer.
At this point, you must Quit the installer.


Delete or drag the Xerox driver pkg installer to the trash.
Add the new printer
Go back to your System Settings—Printers & Scanners.
Click the + (plus sign) to add a printer.
Type/select the following:
Address: copying.ucsd.edu
Protocol: HP Jetdirect - Socket
Name: copying
Location: 4300 (optional - this is the UCSD Imprints identification number for this copier.)
Use: Xerox WorkCentre 4250.
Click Add.
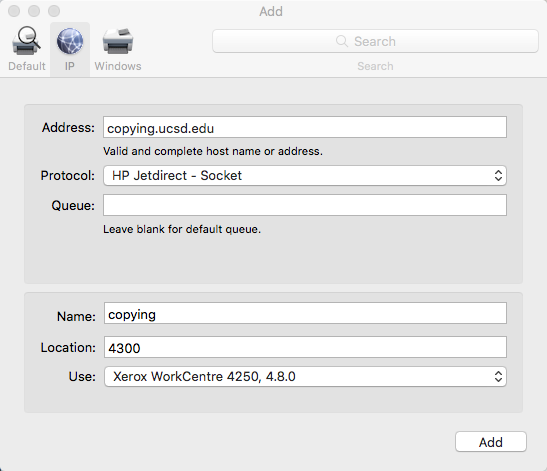
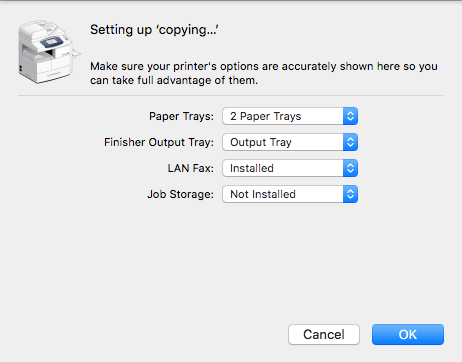
Change these in the configuration screen when it pops up:
Paper Trays: 2 Paper Trays
Click OK.
You can now close out any open System Settings windows. You should now be able to print.
When you first print, it is recommended to disable the banner page to save paper.
Access the Xerox Features—Advanced as shown here and select Disable Job ID from the Job Identification pop-up menu. This setting will be remembered.

coloring
This printer will automatically select the correct print driver as long as the computer can access the printer. Make sure you are on the UCSD network (direct or VPN) when setting up this printer. Otherwise, choose "HP Color LaserJet CP4020-CP4520 Series" for the driver. If this is not available in the printer list, download and use the PPD.
Open your Print & Fax System Preference panel.
Click + to add a new printer.
Protocol: HP JetDirect
IP Address: coloring.ucsd.edu
Name: coloring
inc-workcentre
Delete the old printer
If you have a printer named inc-workcentre already defined, please delete it before continuing.
Access Printers & Scanners from your System Settings.
Select inc-workcentre in the printer list.
Click the – (minus sign).
Click Delete Printer.
If you did not already have a printer named inc-workcentre defined, download the Xerox macOS Print and Scan Driver Installer and follow the next several steps for installing the Xerox printer drivers. Otherwise, continue farther down with adding the new printer.
Install the printer driver
Double-click the driver installer.
Click Continue and Agree to the license agreement in the following screens.
Install to your hard drive.
Click Continue.
Click Install.
Be patient while the drivers are installed.
When allowed, click Continue.
Do not continue setting up a printer.
At this point, you must Quit the installer.
Delete or drag the Xerox driver pkg installer to the trash.
Add the new printer
Go back to your System Settings—Printers & Scanners.
Click the + (plus sign) to add a printer.
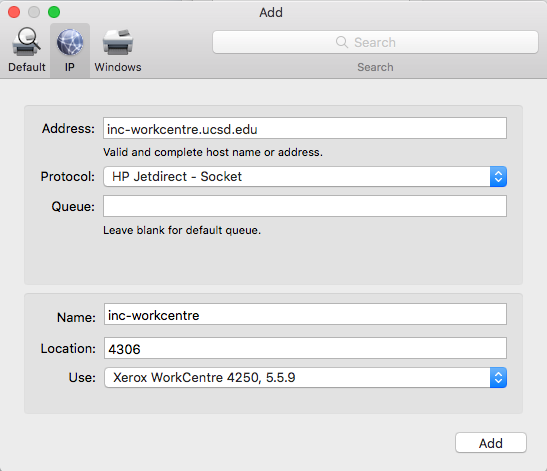
Type/select the following:
Address: inc-workcentre.ucsd.edu
Protocol: HP Jetdirect - Socket
Name: inc-workcentre
Location: 4300 (optional - this is the UCSD Imprints identification number for this copier.)
Use: Xerox WorkCentre 4250.
Click Add.
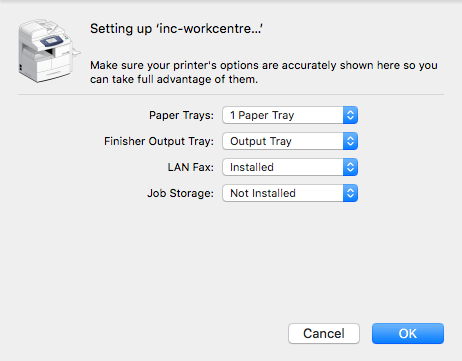
Change these in the configuration screen when it pops up:
Paper Trays: 2 Paper Trays
Click OK.
You can now close out any open System Settings windows. You should now be able to print.
When you first print, it is recommended to disable the banner page to save paper.
Access the Xerox Features—Advanced as shown here and select Disable Job ID from the Job Identification pop-up menu. This setting will be remembered.
inc-color
Click + to add a new printer.
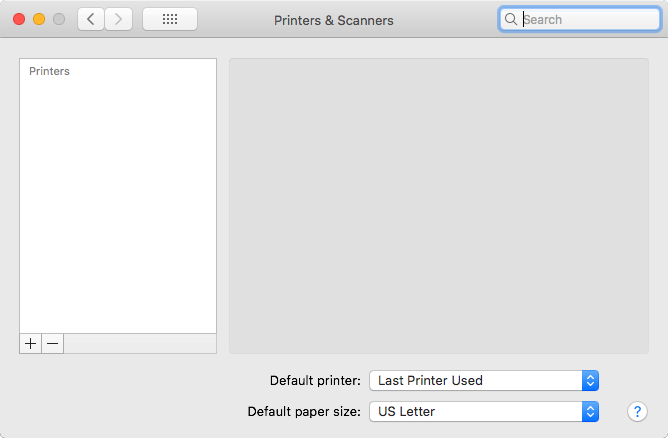
Click the IP button.
Protocol: HP JetDirect
IP Address: inc-color.ucsd.edu
Name: inc-color
Click Add.

Posters
The self-serve large-format HP DesignJet T1100ps in AP&M printer, formerly known as cplot1, is no longer available for use by the UCSD community. Options for printing posters now include Imprints or FedEx Office.
We have a collection of logos (access restricted to the UC San Diego networks) that you may use for your posters. Please do not use logos that belong to The Chancellor and UC San Diego Library.
How do I start designing a poster?
Use your favorite program that can handle large paper sizes. This includes Powerpoint, Illustrator, InDesign and Pages. Standard paper rolls are either 36 or 42 inches wide, so it is recommended that one of your poster dimensions is set to one of these values. Set your document size in advance before placing any elements on the page to avoid scaling and spacing issues. Also, it is recommended not to place elements, especially text, near the edge of the poster (1/2 inch or so), because the printable area is smaller than the actual paper size, typical for most printers.
How do I start printing a poster?
It is always recommended to "save as..." or export your poster to PDF. Most printing services can handle PDF files far better than native Illustrator, PowerPoint, InDesign, etc., files..
The following procedure to save your poster as PDF can potentially damage your poster file. Please read carefully.
Save your poster file. Start from your saved file. Then "Save As..." and choose the PDF file type. Do not use any "Print" or "Print to PDF" methods. That will result in a PDF that will not be usable on the large-format printer.
Immediately after saving your poster as PDF, close your poster file. This will ensure that additional changes get saved back to your original poster file and not the newly created PDF.
Some services allow you to send the file through email in advance, but be sure you have all of the following information available before doing this.
- The preferred poster dimensions (if not the actual poster file dimensions). Remember, one of the dimensions must be 36 or 42 inches. Otherwise, you will need to manually cut the paper down to size. If you require a specific size that is not 36 or 42 inches, make it clear in your request.
- Specify the paper type: heavyweight coated, semi-gloss or high-gloss. We recommend semi-gloss because the coated is a little too flat, and the glossy is a little too reflective in most artifically lighted environements. There are examples of each of these throughout the SCCN lab.
Information for Triton Print & Digital Media
You can either order online or drop off your PDF to Triton Print and they will be able to accommodate you. They have services adjacent to the computer store within the UC San Diego Bookstore. Although the printing services are in the Campus Service Complex, they should be able to deliver your poster to the UC San Diego Bookstore location for your convenience.
Information for FedEx Office Print & Ship Center
FedEx Office Print & Ship Center used to offer us significant discounts, but those days are gone. The facility is located near the campus in the same shopping center as Whole Foods, CVS, and BJ's Restaurant & Brewhouse.